Learning the ins and outs of a new tool is always tricky. You will have to walk through tutorials, read documentations and after hours of frustration you might close your laptop and call it a day. komoot is very easy to use for planning a cycling route and gets you started immediately. Still there are some tips and tricks to plan your perfect gravel ride, find the best MTB trails and just discover that tiny tarmac road far off the high traffic routes. Follow this step by step guide and we will make you a komoot route planning pro!
If you don't have the time to create your own route, take a look at our >Route Collection< . Here you will find a selection of the best routes in regions we have already explored.
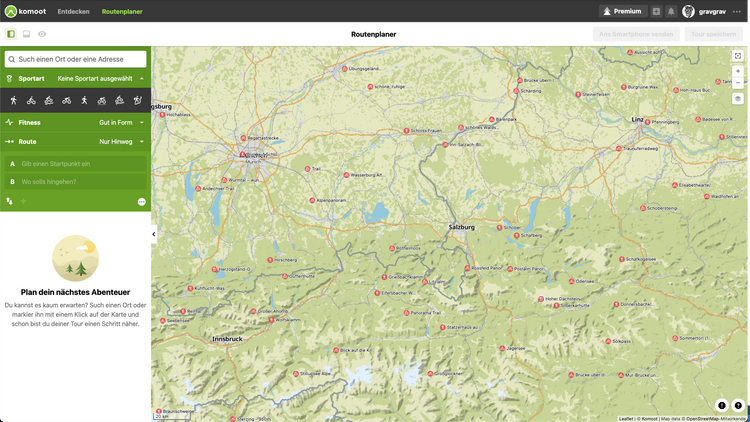
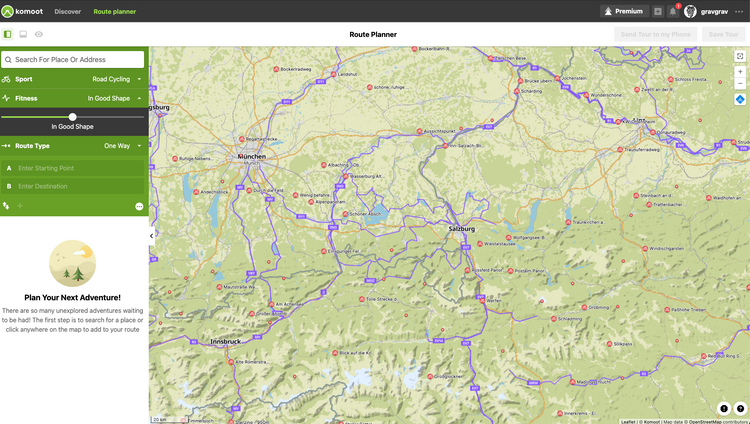
Step 1 - Choose the right activity type
First you need to choose what kind of terrain you are planning to ride. You might realize that when you choose road cycling as a sport on the left of the screen, the map and the highlights displayed change. With the new maps update important cycling paths are highlighted, which makes planning super simple! Each sport specific map has an optimised layout to aid you in evaluating terrain and elevation differences and even distinguish what kind of surface and difficulty a path has while planning your route.
Step 2- Choose your fitness level
While this is not affecting the quality of your route in any way, correctly choosing your fitness level can help you estimate realistic time schedules for your planned ride. And this can be very important for longer rides or especially bikepacking trips. So go ahead and choose your level honestly. (Yes this is not a competition. 😜 )
Step 3 - One Way or Round Trip?
Now this is quite important for getting started. But it is also quite simple: Do you plan part of a longer route that ends at a different point then where you start off? Well that's one way. Planning your after work loop door to door? That's a round trip.
komoot helps you by automatically connecting the dots either between start and end point, or getting you back to your home. And while doing so it tries to find the best way to do so, automatically and to avoid high traffic routes.

Step 4 - Define your start- and end point
In this case we will start at Salzburg's Kaffee Alchemie. You can search for a place by typing the name in the searchfield on the top left, or click on a point on the map. You will then be asked if this should be your startpoint or destination.
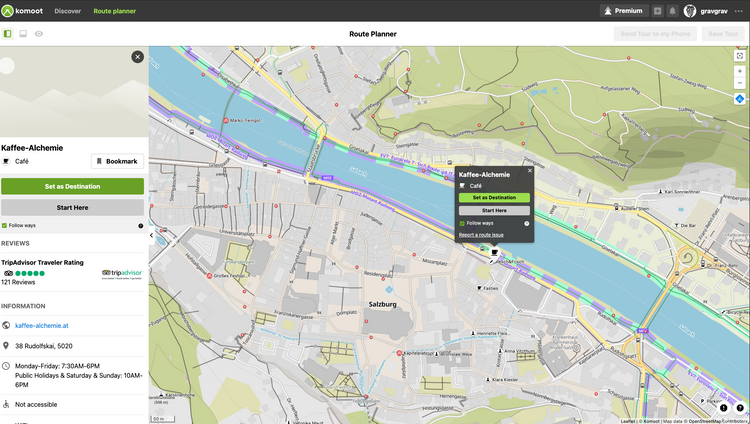
Today we plan a nice Sunset ride up to Gaisberg. a spicy climb, but what a view.
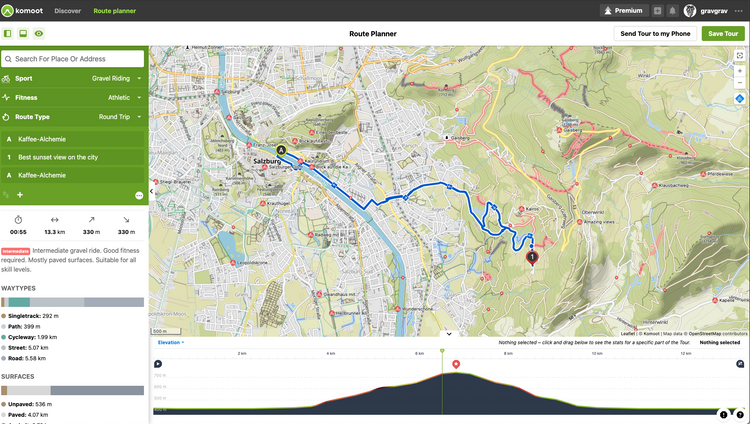
Step 5 - Add some Highlights or points to your cycling route
Now that you have basically a line from your startpoint to destination and back you can add points to your route to make it more interesting. A very good starting point are Highlights. Millions of users create and contribute to them so you can identify the best spots to ride at in an area. You can check the pictures from other users and read through some of the tips others left there for you. If you just want to add a point on the map click there and you can add it even without any highlight.
Step 6 - Check your Terrain
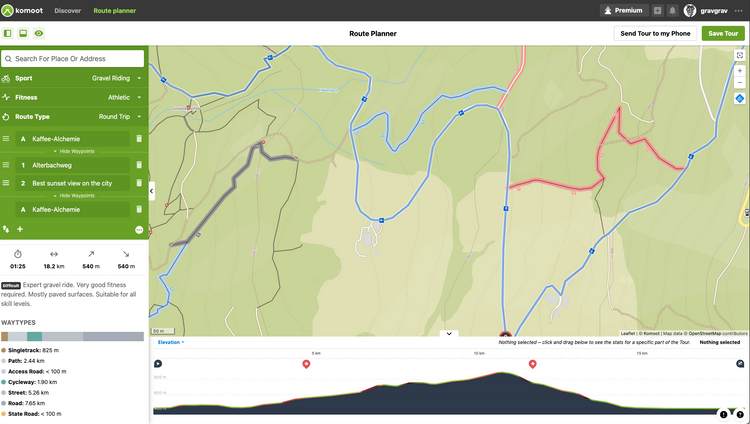
In the Elevation profile at the bottom of the screen you have a lot of useful information. A green line means this is an easy gradient, a red or even dark line means a very hard gradient if you hover over the profile with your mouse you will get detailed information on incline and more. You will also see the position of your added highlights and infos like sections where it's forbidden to ride a bike so you can plan around them.
You will also see some trails are marked with colors and are labelled "S1", or "S3" or simillar. This is the technical difficulty based on the Singletrail Scale. This includes 6 levels from S0 (the easiest) to S5 (the hardest). Don't underestimate them and take that into account if you want to ride off-road.
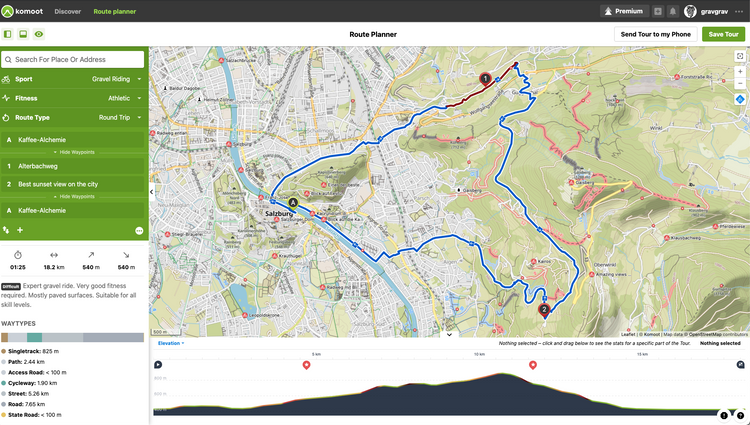
Step 7 - Fine tuning and cleaning up
Now that you have added all the points to your route that you want to ride, you are nearly ready to get going and actually ride! But wait what's that? There is a weird hick-up. One point added to the route is mixed up and at the end instead of the beginning of the route. Well, things like that happen, but that's not a big deal. On the left you can see a list of all the waypoints on your komoot route.
You can rearrange them by Drag'n'Dropping the 3 bars that appear on the left of each waypoint when you hover over the list. Just rearrange them till you got it right.
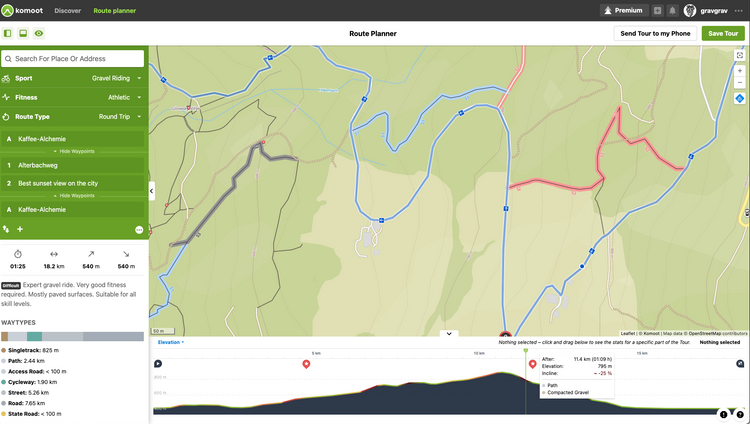
Now you also want to check on the details. On the bottom left you see your way types. Do you have 800m singletrail on your road ride? You might want to check this. Just hover over "Singletrail" and you will see the segment(s) on the map highlighted. This is very useful to avoid unpleasant surprises like riding on a state road with loads of traffic for a longer time.
Pro Tip
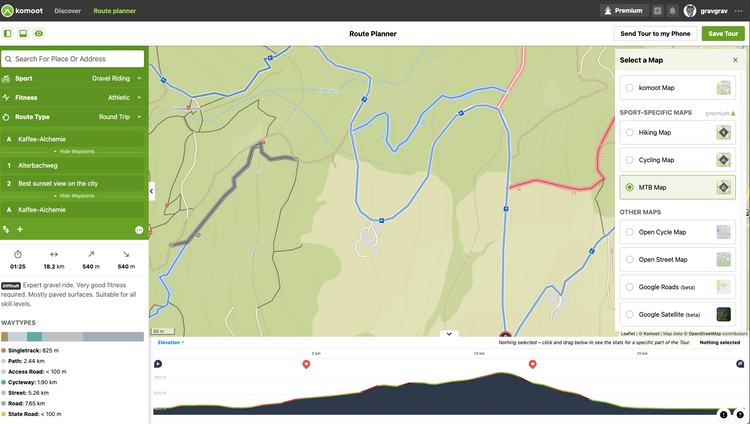
You can change the map layer with the small icon below the zoom controls and center button at the top right. So if you really like to get wild and want to plan very detailed you can for instance use a hiking map to get more detailed information and highlighted hiking paths. You can even compare between other open source maps.
There is tons of more features and ins and outs to discover. On the bottom right you can see the "?" icon. Here you can always discover more detailed information on how to use komoot to plan your routes.
Did we miss anything? Let us know and we will make sure to update this little guide! But most importantly have fun out there and make sure you also get out and ride.